























How to Connect MCP to Themify WordPress Themes Using Easy MCP AI
Artificial intelligence is changing how we manage WordPress websites. With the Model Context Protocol (MCP), compatible AI assistants can connect to supported WordPress tools and carry out tasks within the permissions you authorize. In this tutorial, we’ll connect a Themify-powered website to ChatGPT or Claude using Easy MCP AI, then test practical WordPress workflows.
Important: Easy MCP AI connects to WordPress itself, not specifically to Themify Builder. It can work alongside Themify Ultra, Shoppe, Parallax and other themes, but full control of Builder rows, columns, modules and styling requires a separate Themify-aware integration.
What you’ll learn
- What MCP is and how Easy MCP AI fits into a Themify site
- How to install the plugin and connect ChatGPT or Claude
- How to review OAuth permissions and available tools
- How to test read and write operations safely
- What MCP can and cannot do with Themify Builder and Post Type Builder
- How to troubleshoot common connection problems
What is MCP (Model Context Protocol)?
MCP is an open protocol that lets compatible AI applications communicate with external tools and data sources. Think of it as a bridge: the AI assistant receives a list of tools exposed by a server, and can call the tools that are available to it.
Without an MCP connection, ChatGPT might explain how to create a WordPress post. With a suitable MCP server and the right permissions, it can call a WordPress tool to create the draft for you. You should still review important changes before publishing.
What is Easy MCP AI?
Easy MCP AI is a WordPress plugin that exposes supported WordPress functionality to compatible AI clients. Its available tools can cover content, media, taxonomies, comments, custom post types, site information and integrations. The exact toolset depends on the installed plugins, enabled integrations, configuration and the WordPress user’s capabilities.
You do not need to build and host a separate Node.js MCP server for the plugin’s built-in WordPress connection. The plugin runs within WordPress and provides an MCP endpoint that a compatible client can connect to.
Plugin: Easy MCP AI – WordPress plugin directory
Developer: Themeisle / EasyMCPAI
Documentation: Easy MCP AI documentation
How MCP works with a Themify website
The connection flow is straightforward:
- Your WordPress website runs a Themify theme such as Ultra, Shoppe or Parallax.
- You install and activate Easy MCP AI.
- The plugin exposes supported WordPress operations through its MCP server.
- You add the server to a compatible AI client such as ChatGPT or Claude.
- You sign in to WordPress and approve the requested access.
- The AI client can call the tools made available by the plugin and your permissions.
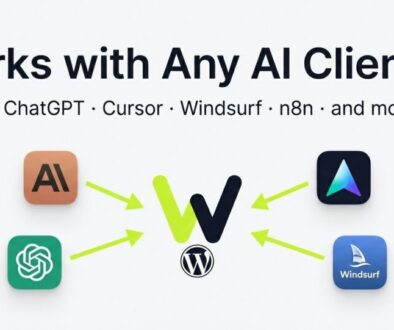
AI assistant (ChatGPT / Claude) → MCP → Easy MCP AI → WordPress tools and REST functionality → WordPress site with Themify
The theme controls the front-end design and Themify Builder experience. Easy MCP AI exposes WordPress capabilities; it does not automatically understand or edit every proprietary Builder data structure.
Requirements before you start
- A WordPress website with a Themify theme or Themify Builder installed
- Administrator access for installing the plugin and configuring the connection
- Easy MCP AI installed and activated
- A compatible ChatGPT or Claude client and account
- A working HTTPS site and a recent backup
Step 1: Install Easy MCP AI
Sign in to your WordPress dashboard and go to Plugins → Add New Plugin. Search for Easy MCP AI, check the plugin listing and developer, then select Install Now and Activate.
You can also find it in the WordPress plugin directory. Keep WordPress, PHP and the plugin on supported versions, and follow the current requirements in the plugin listing and documentation.
Step 2: Open the Easy MCP AI dashboard
After activation, open Easy MCP AI → Dashboard. Review the setup guidance and the connection options shown by your installed version. The dashboard is also where you can review available connections, tools, activity and settings.
Step 3: Connect ChatGPT to WordPress
Find your MCP endpoint
In Easy MCP AI, select the ChatGPT connection option and follow the instructions for your plugin version. The endpoint commonly follows this pattern:
https://yourdomain.com/wp-json/easy-mcp-ai/v1/mcp
Use the exact endpoint supplied by your dashboard or current plugin documentation. Do not copy a sample URL without replacing the domain.
Add the connection in ChatGPT
Open the ChatGPT connector or MCP configuration area available to your account. Add a custom connection, give it a recognizable name such as WordPressVed, and enter the MCP endpoint provided by Easy MCP AI. Follow the authentication method and setup flow shown by the plugin and ChatGPT. Interface labels and availability can vary by ChatGPT plan and product version, so use the current in-product instructions rather than relying on a fixed menu path.
Review any security warning before continuing. Only connect to a site and MCP server that you trust.
Step 4: Authorize ChatGPT on your WordPress site
During the connection flow, your browser may open a WordPress authorization page. Sign in with the WordPress user you intend to authorize. Read the requested access and approve only when the site, client and permissions are expected.
Use an account with only the capabilities needed for the intended tasks. A connection authorized with write capabilities can change content; do not grant broad administrator access merely for convenience.
Step 5: Connect Claude (optional)
Easy MCP AI also supports compatible Claude connection workflows. In the plugin dashboard choose the Claude option and follow the current instructions. In Claude, open its connectors or integrations settings, add a custom connector when your account supports it, enter the MCP endpoint and complete the authorization flow in WordPress.
Claude’s interface and the availability of custom connectors can change. Follow the instructions shown in your Claude account and the plugin documentation.
Step 6: Review tools and permissions
Open Easy MCP AI → Tools. Review which WordPress tool groups and plugin integrations are enabled. Depending on your configuration, tools may cover posts, pages, media, comments, categories, tags, custom post types, themes, plugins, menus and supported integrations such as WooCommerce or SEO plugins.
Not every integration is enabled by default, and an AI client can only use tools that are available to that connection and permitted for its WordPress user.
Recommended approach: begin with read-only tasks. Enable editing only after you understand the scope of the available tools. Keep destructive or privileged actions disabled unless you have a clear need and suitable safeguards.
Step 7: Test the connection with real WordPress tasks
Start with a read-only prompt. For example:
Show me the 10 latest published posts on this WordPress website. Return each title and permalink. Do not make any changes.
Then try other read-only prompts:
- List the published pages on my website.
- Tell me which WordPress theme is active.
- List the active plugins.
- Show the custom post types registered on this website.
- Find posts assigned to a particular category.
When read-only requests work, test a limited write operation on a staging site or with a harmless draft. For example:
Create a draft titled “MCP Connection Test” with a short note saying this is a test. Do not publish it.
Open Posts → All Posts → Drafts in WordPress and verify the result. Check the title, content and status. Delete the test draft when you have finished verifying it.
Step 8: What can MCP do with Themify Builder?
This is an important distinction for Themify users. Easy MCP AI makes WordPress functionality available to an AI assistant, but that does not mean it automatically exposes every Themify Builder row, column, module, responsive setting or style control.
With supported WordPress tools, an assistant may be able to retrieve or update page content and work with posts and custom post types. Directly inserting a Themify Builder module, changing row styling, adjusting breakpoints or modifying Builder layout metadata requires a dedicated integration that understands and safely updates those structures.
Any custom Themify integration should be tested on staging, validate the layout data before saving, and provide a reliable rollback path. Do not assume that a generic WordPress content update is equivalent to editing a page in Themify Builder.
Step 9: Use MCP with Themify Post Type Builder (PTB)
Themify Post Type Builder can be used to create custom post types and taxonomies such as portfolios, projects, events, team members or testimonials. Easy MCP AI may expose operations for a custom post type when WordPress registers that type in a way the plugin can access and the connected user has the required permissions.
For example, you might ask the assistant to list published projects or create a draft portfolio item. Custom fields, complex PTB configurations and custom taxonomies are not guaranteed to be available automatically; check the specific tool and REST API support before relying on them.
Step 10: Troubleshoot common connection problems
The MCP endpoint returns 404
Check the endpoint against the value shown in Easy MCP AI. Review WordPress permalink settings and run the plugin’s diagnostics. Follow its server-specific guidance if your web server or rewrite configuration is preventing the route from being reached.
The AI client cannot connect
- Confirm the endpoint is correct and the site is reachable over HTTPS.
- Complete the OAuth authorization flow in the same browser session when prompted.
- Check whether a security plugin, firewall or CDN is blocking the MCP routes.
- Run Easy MCP AI diagnostics and review the activity or audit log for a specific failure.
Tools are missing in ChatGPT or Claude
Check Easy MCP AI → Tools, verify the connection’s permissions, and reconnect or refresh the tools in the client. An integration that is not enabled, or a capability the WordPress user does not have, may not be available to the AI assistant.
A firewall or security plugin blocks the request
Review the firewall events and rules for the MCP and OAuth routes. Allow only the required legitimate traffic. Do not turn off all security protections to make a connection work.
The AI cannot edit Themify Builder modules
This may be a feature limitation rather than a connection failure. Standard WordPress tools do not provide complete control over Themify Builder internals. A Builder-specific integration is needed for those operations.
Security best practices
- Start with read-only access. Add write permissions only for tasks that require them.
- Use least privilege. Authorize a WordPress user with only the capabilities needed.
- Review activity and audit logs. Keep track of the operations performed through the connection.
- Use change history and approvals. Enable available safeguards for edits and destructive actions.
- Back up the site. Keep a recent backup and test significant changes on staging.
- Protect credentials. Never paste tokens, secrets or one-time authorization codes into public tutorials, screenshots or support threads.
- Use HTTPS and updates. Keep WordPress, the theme, plugins and server software updated.
Conclusion
Easy MCP AI gives compatible AI assistants a way to work with supported WordPress functionality on a Themify-powered website. You can connect ChatGPT or Claude, review permissions, and use natural-language prompts for supported content and site-management tasks.
Remember that the MCP connection is to WordPress, not a complete remote-control interface for Themify Builder. Direct editing of Builder modules and layouts needs additional Themify-aware integration. Start with read-only prompts, verify each operation in WordPress, and keep backups and audit history in place.
Related reading: How to Use Easy MCP AI on Your WordPress Site and How to Create Custom Post Types Using Themify Post Type Builder.